
Product photography is a specific type of photography used in e-commerce to present your items to your potential customers attractively.
It means that the product photo is a fundamental element in any online business that, well applied, enhances the value and visual perception of the brand, thus awakening the interest of the consumer.
Therefore, in this guide, we will share the keys to take pictures of this style like a professional and increase the chances of sale eCommerce.
Table of Contents
The importance of product photography in an online store
Product photography is the most critical piece of any online business since, through it, potential customers can see in detail what the item they want to buy is like, which can make the purchase complete faster.
This type of photography aims to focus all the attention of consumers on a single element: the product. The photo shows as much information as possible such as size, color, texture, and accessories of the piece from different angles.
The secret is to pay special attention to creating these photographs and discovering which style goes best with your brand.
In this guide on product photography, we will tell you everything you need to know to achieve the best photos of your items and increase your sales!
Professional Photography: Keys to Taking Photos like an Expert
This section will share 4 tips for creating your product photographs like a professional and taking your online business to the next level.
1) Lighting for product photography
Lighting is the most crucial point to take into account when taking a photograph as it defines, to a large extent, how attractive the image is going to be.
To take a product photograph, you can choose between two types of lights:
. Natural light
. Artificial light (which, in turn, can be warm, cold, or neutral)
The idea is to take it with natural light or artificial light in the product photo but in neutral or cold temperatures. Keep in mind that the important thing is not to mix the different types of lights or temperatures: by choosing only one, you will obtain better quality images.
If you are entering the world of photography, we recommend that you opt for natural light as it is easier to handle. In any case, artificial lights have in their favor that they allow taking pictures without changes between product and product, especially if the photo session lasts many hours.
Watch the following video and learn how to assemble the set to take the photos of your items:
2) Product photography lightbox
To take your product photographs, you have the option of building a lightbox. A lightbox is an excellent tool that helps to obtain well-lit photos that make the item stand out.
In this case, the product photo can be taken using two cold light lamps, one on each side of the box. The important thing is that you diffuse that cold light with tissue paper to achieve a softer light effect.
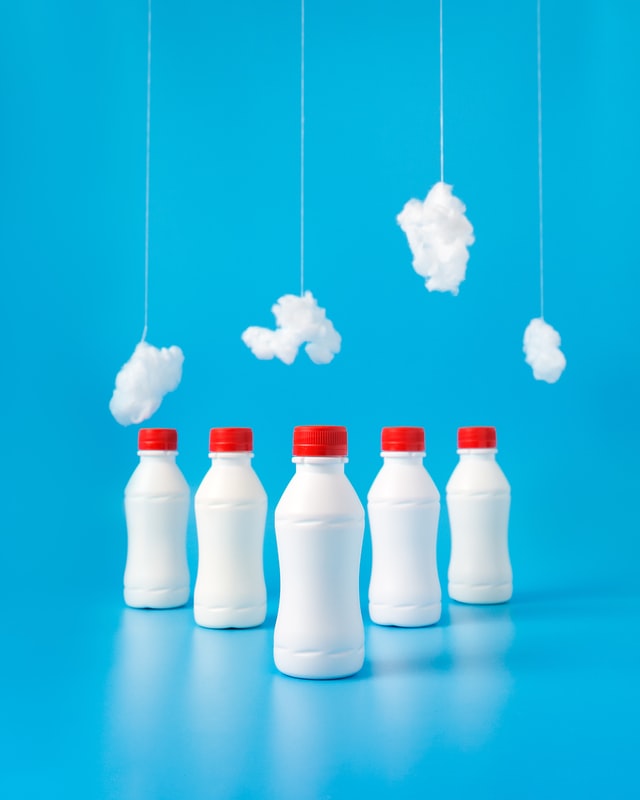
3) Backgrounds for photography
Backgrounds for photography are essential when taking a photo since they are the ones that will allow the product to stand out and harmonize the image.
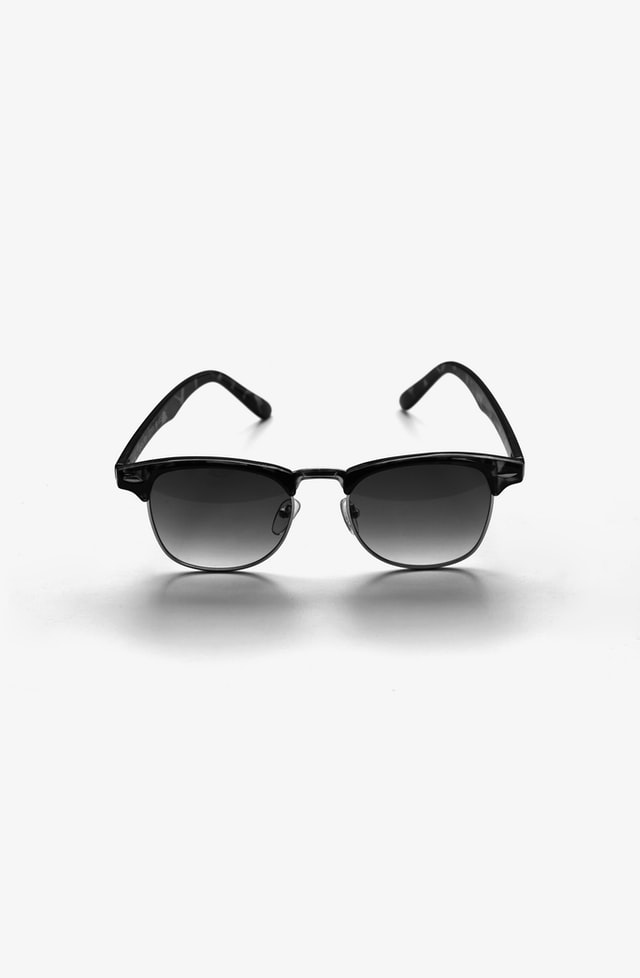
. White background
The all-white photography background ensures that the photographed product is the star of the image, the centerpiece. Keep in mind that it can be accompanied by elements that complement the aesthetics and functionality of the article, but always without overshadowing it.
On the other hand, photographing with this type of background makes it easier to edit the image since it allows you to cut the product without difficulty and place it, for example, on digital white background.
. Color background
Another option of background for product photography is color, as long as they are tones that represent your brand and you consider that they combine or contrast with the item you are going to photograph.
If you want to see examples of different backgrounds for photography, watch the video that we share below.
In future sections, we will see the different types of product photography, and, there, you will discover that some photographs do not need these background styles since the article is in context, that is, in a situation of use. Keep reading this guide to find out more!
4) Camera position for professional photos
As we told you in the first video, in addition to setting the quality of the image you are going to take in the camera (we suggest that it be the maximum possible so then the editing stage is more accessible), taking the professional product photos we recommend you:
. Place the camera at the same height as the item you are going to photograph.
. Use a tripod for stability and avoid all kinds of movement.
. Try different angles of photography to find out which options are best for the article.
. Check that your photos have “air,” that is, a space between the edges of the image and the product unless you photograph a detail of it.
. Take product photographs from an overhead plane (which is when the camera is placed perpendicular to the ground) accompanied by other elements that complement the scene.
By following these tips, you will be able to take professional photos.
Brand identity in product photography
The concept of branding is used to refer to the process of building a brand.
In this process, what is sought is to highlight the values representing it, the ideas linked to it (such as lifestyle, for example), and their differentials competition. That is the brand identity itself.
It is essential to highlight that all the elements that make up a brand influence its image and the behavior that consumers have (or may have) towards it. And at this point is where product photography comes in.
If a business does not take care of its photographic identity, it can undermine the extraordinary efforts to convey its unique personality and values.
Product photography evokes, without words, the way of being of the brand: who it is, what it does, how it does it, for which it does it. It means that photography is a graphic resource that has great potential for communication and expressive capacity that, when used well, can lead the customer to purchase more quickly.
“The best advice we can give you to get the most out of your product photographs is to be consistent between the image you show and what you want to convey as a brand.”
Communicative coherence is critical for your message to impact the consumer and, at the same time, to improve the identity and positioning of your brand in the online world.
Types of product photos
Different types of photography can be used to bring your products closer to your potential customers, which complement each other (that is, one does not necessarily replace the other). Your choice will depend on the product you want to show.
We share the 3 main types of photography to apply in your online business:
1) Photography lifestyle ( lifestyle )
This type of photography seeks to associate, in the same context, a particular product with other articles that the target audience finds attractive. In this way, more than a product is offered: a lifestyle is offered.
This photography related to the aspirational can lead customers to define themselves faster by the purchase. Through it, they already have an initial idea of how they could use the product.
2) Texture photography
Texture photography allows online customers to have an “almost tactile” experience with the product they want to buy.
To achieve this type of photography, it is ideal that you take a close-up photo of the item that allows you to distinguish the texture of the material.
In addition, you can take advantage of the zoom option (extreme approach to the product) that your online store offers you so that the consumer can see the product even more closely, both through the cell phone or computer screen, as long as the photos are high quality.
3) Scale photography
A recurring question of online consumers is usually the physical size of the product they are interested in buying. Based on an image of the product alone, it isn’t easy to calculate.
The goal of scale photography is to remove this doubt by showing how big (or small) a product is.
Various techniques are used for that. For example, a prevalent one is to photograph a hand holding the product: if the product fits between a few fingers or in the palm of a hand, it is small.
Increase your sales! Creative photos to display your products
In this section, we will share some ideas for you to achieve creative photos that show the best angle of your products and make them stand out.
– Creative photo 1: Use your product yourself. It is a product photo that can benefit your brand identity since, generally, people are curious and like to know who the faces behind a business are.
Use this to your advantage and take advantage of this creative photo to connect with your potential clients.
– Creative Photo 2: Provide (many) ideas on how to use your product. If you show your consumers the different ways they can use the item they are interested in, it will likely tempt them to buy it faster. It’s like offering multiple products in one!
– Creative photo 3: Visually show its benefits. This product photography option will depend on the niche of your business. If, for example, you sell products that are made with natural raw materials (such as lavender, vanilla, lemon, etc.) or with environmentally friendly material (such as reused), take advantage of that strength to visually communicate it to your consumers.
– Creative Photo 4: Give your photos a unique identity to gain recognition among your audience and make your photos stand out from your competition; ideally, you aim to achieve an aesthetic that identifies them.
It can do it by working on different photograph elements, such as the background filters you apply to.
In addition, in many of his product photographs, he adds a natural detail (such as plants or flowers) to give a touch of personality to the photo and enhance the brand’s sustainable values.
The best programs to edit product photos
Once you’ve taken the product photos, it’s time to move on to the next stage: editing.
Perhaps you already know some programs to edit photos from both the cell phone and the computer. Some are free, others have a free and paid version, or they are 100% paid.
In this section, we are going to share our chosen ones so that you can select the alternative that suits you best:
. Snapseed: It is one of the most popular photo editing programs on the market. It has several tools and filters that are very easy to execute. In addition to being available for Android and iOS, Snapseed offers tutorials arranged by topic so that you can become a photography expert.
. Camera FV-5: It is a professional photo camera application that allows you to configure photographic resources such as exposure, white balance, ISO, and focus settings. Camera FV-5 is available free for Android.
. Afterlight: This mobile application offers almost 60 different filters to edit your product photos, and some of them were designed by professional photographers. On the other hand, After light is one of the most sought-after applications for the quality of its filters and is straightforward to use on both Android and iOS.
. Pixlr: The product photographs you take can also be edited with Pixlr, a free online editing tool that has options for size adjustments, filters, color retouching, among other options.
. VSCO: This is a complete mobile application for image editing since it has different options such as contrast or saturation, for example. In addition, it offers tutorials to learn tricks when using it with Android and iOS. The particularity of VSCO is that it generates community. It allows you to explore the content of other people you follow within the application and the works selected by the same community.
. Lightroom: This exclusive Adobe program is one of the most professional available on the market. It has a free trial version and 3 paid plans. With Lightroom, you will be able to edit, save and share your photos on computers, mobile devices, and on the web, in addition to having hundreds of options to compose your images.
Do you already have your product photographs, and did you choose the program to edit the photos? Then we share some recommendations to upload them to your online store:
– Try to make the image size at least 1024 x 1024 pixels. With that measure, the photos will look good on both a computer and a mobile device. Also, the zoom tool will work fine.
– Save the image file in .png format as it has better quality than others.
Ensure that the product photos you upload to your store are the same size, so the product grid looks even.
It may make sense to place rectangular images in fashion stores instead of square ones (to show full-length photographs, for example), but always respecting 1024 pixels as a minimum width measurement.
In the next section, we will address other peculiarities that the photos of fashion products present.
Finally, it would help if you kept in mind that it must compliment all product photography with an excellent and complete description. It can help your potential client get rid of doubts about the sizes, colors, and material of the article.
Specific characteristics of fashion photography
As we said at the beginning of this guide, photography is the essential element of any online business. It can awaken the interest of the consumer and lead him towards the purchase.
However, there are some differences between product photography in general and fashion photography in particular.
As a fundamental premise, it is essential to point out that fashion photography seeks to highlight the product and a series of ideas related to the brand, that is, the lifestyle it represents, the aesthetics with which it identifies, and the use it proposes. Of your articles;
– The location to be used. Whether in a studio or outdoors, it has to represent the lifestyle that the brand promotes.
Therefore, for one of his campaigns, he chose a model and used an interior location (to simulate the night) where details such as bright lamps, old paintings, large curtains, among others, can be seen.
– The elements that can appear in fashion photography to reinforce ideas related to the brand.
For example, if a brand seeks to represent a free, fun, and carefree lifestyle, it is ideal that both the hairstyle and the makeup are as natural as possible.
– The garments to be photographed. In addition to ensuring that they are in excellent condition (clean, ironed, and without any defects), in fashion photos, it is essential to pay attention that the garments are always shown in the best possible way, taking care that they fit well in the models unset or wrinkle.
Product Photos: Time to Get Started
We hope this exclusive guide helps you get started creating your product photos like a pro.
Remember that the photographic style you choose will have a direct impact on your brand image. Therefore, we recommend that you dedicate time and dedication to the production of these photos.
Dare to experiment with this creative process. Try different angles, different backgrounds, and types of photography to find the best way to display your products. Thus, you will get high-quality images that convey the values of your brand and help, at the same time, boost the sales of your online store.